
What this is for. For the one-off items a spreadsheet would be overkill for: a new defog spray on the counter, a local brand, a product no distributor carries. You fill in one form and the product is on the register straight away, with its photo, price, barcode and stock count. A product you add by hand is yours alone: no distributor update ever changes it.
Two places, one product
You can add a product in OneDive B2B or on the register. Both forms have the same fields and save to the same product, so it shows in both places the moment you save.
- OneDive B2B, My Inventory › Add Product. The roomy one. Use it at a desk, and for products with sizes or colors, where the variant table needs the width. The steps below use this form.
- The register, Catalog › Add product. The same fields in a panel on the right. Handy at the counter. A few labels differ, listed in step 7.
Open the form
In OneDive B2B, open My Inventory and choose Add Product. The form opens as New product.

- Import. For many products at once. See Import products from a spreadsheet.
- Add Product. Opens the form for one product.
Title, description, photos and organization
Only the Title is required. The Add product button at the top stays grey until there is one. Everything else can wait and be filled in later.
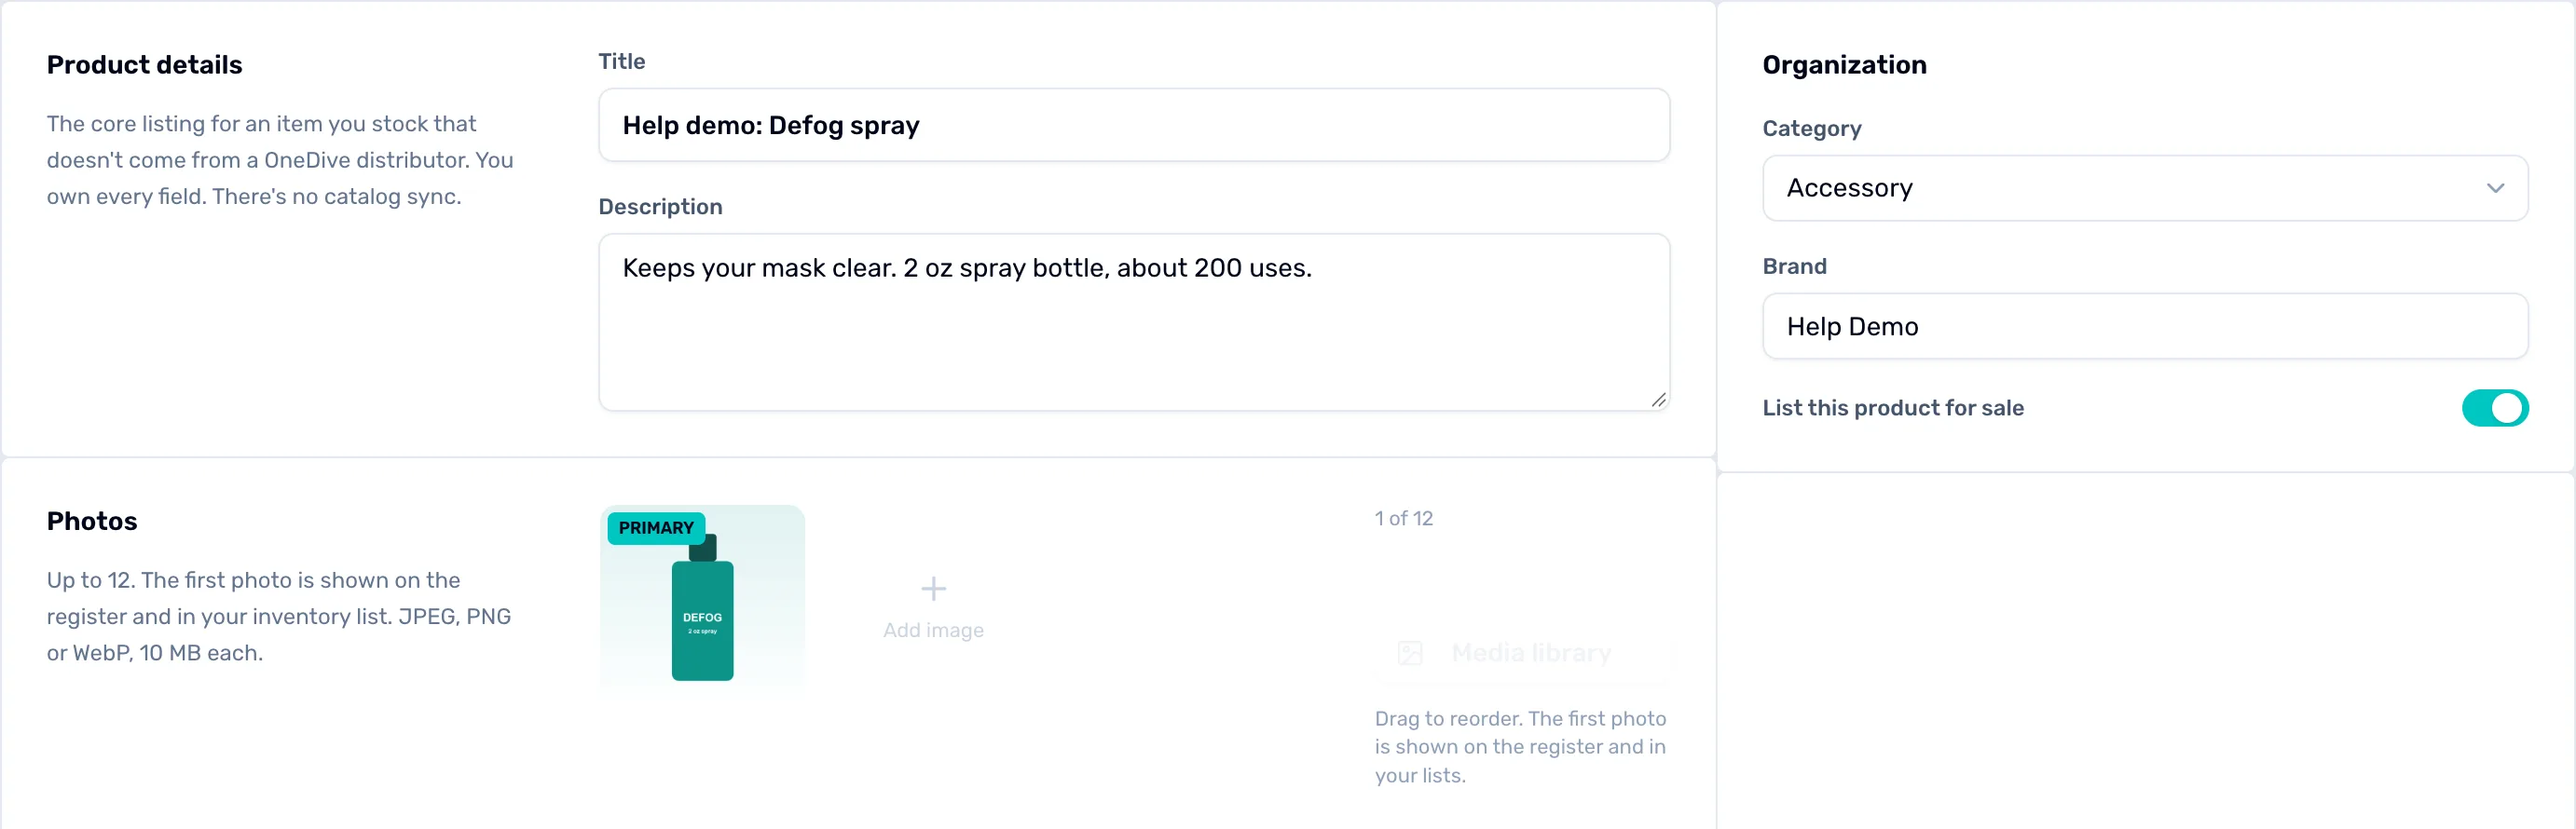
- Title. The name on the register tile, the receipt and every list. Write it the way a customer would ask for it.
- Photos. Up to 12, JPEG, PNG or WebP, 10 MB each. Click the Add image tile and pick the photos from your computer. The first photo, marked Primary, is the one the register and your lists show. Drag to change the order.
- Category and Brand. Pick from the fixed category list, or leave it at — None —. The register's Catalog filters by both.
- List this product for sale. On means it sells on the register as soon as it has a price. Off saves it without selling it. See Listed, hidden and archived.
Description is optional. It shows with the product in OneDive and on the register's product picker.
Set the prices
Type dollars and cents. Only My Price is ever charged. A product with no My Price is saved but doesn't show on the register until you add one.
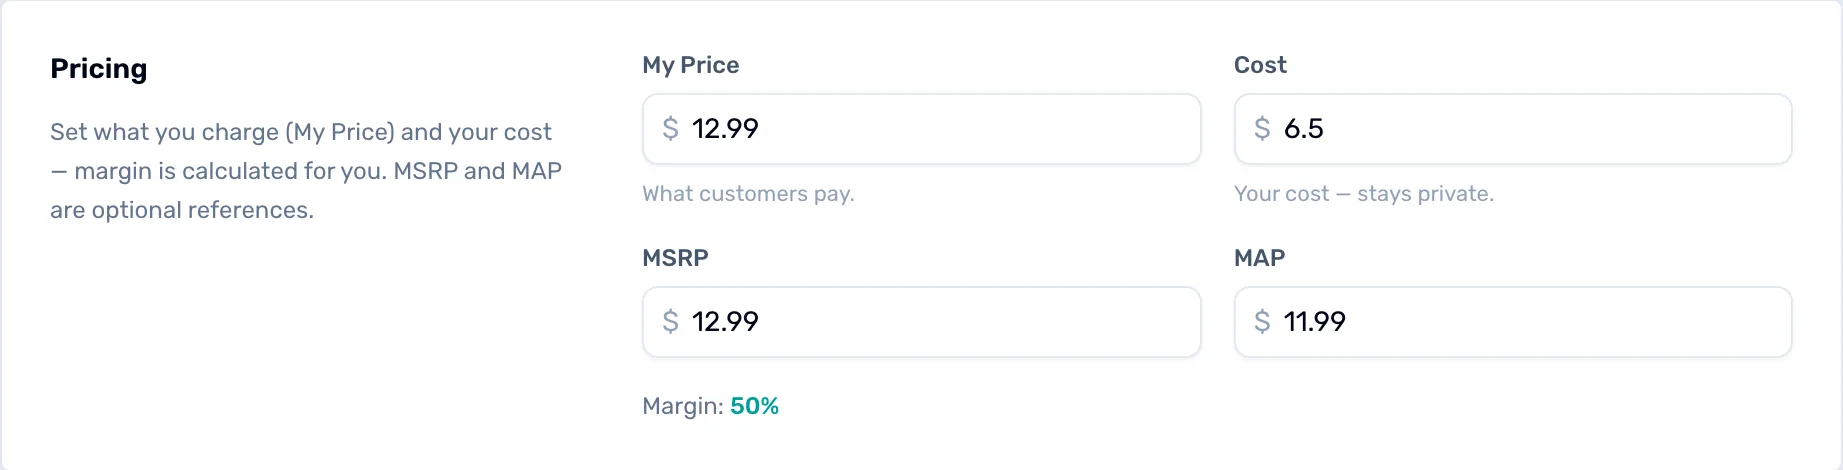
- My Price. What customers pay. The register charges it and the receipt prints it.
- Cost. What one costs you. Never shown to customers.
- MSRP. The manufacturer's suggested retail price. A reference only.
- MAP. The lowest price the brand lets you advertise. A reference only.
- Margin. Worked out for you from My Price and Cost. It turns red with "cost is above your price" if you would sell at a loss.
More on what each price does in Cost, MSRP, MAP and My Price.
SKU, barcode and stock
Stock is counted at your shop's main location.
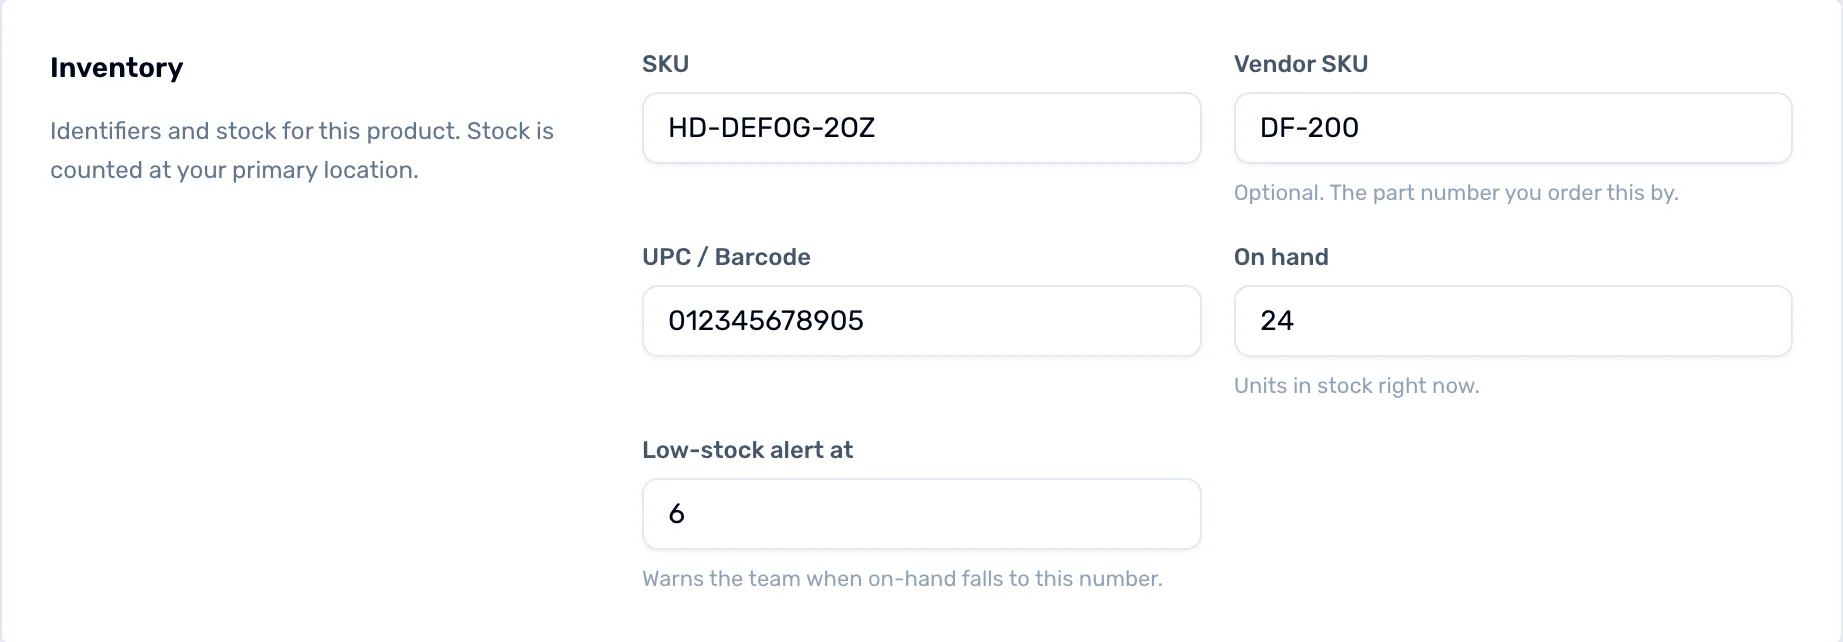
- SKU. Your own code for the product. Search finds a product by it, and a spreadsheet import uses it to update this product instead of adding a second one.
- Vendor SKU. Optional. The part number you order it by from your supplier.
- UPC / Barcode. The number under the barcode on the box. Scan it into this box with your scanner. Then a scan at the register adds the product to the sale.
- On hand. How many you have on the shelf right now.
- Low-stock alert at. When On hand falls to this number, the product counts as low stock. Leave it empty for no alert.
Sizes or colors? Turn on options
Below the Inventory panel, Variants has one switch, This product has options. Leave it off for a product that comes one way, like this spray. Turn it on for sizes or colors: each size then gets its own SKU, barcode, price and stock, and the SKU, UPC / Barcode and On hand boxes above read "Managed per variant". The whole how-to is in Sizes and colors: variants.
Save it
Choose Add product at the top right. You go back to My Inventory with "Product added" at the bottom of the screen, and the product in the list. Cancel leaves without saving.

- Needs Match. Optional. Matching it to a distributor's catalog keeps its cost and details current. See Match your products to the master catalog.
- Unlinked. No distributor catalog is behind it, so nothing changes it but you.
- The … menu. Edit reopens the form. Click the product name to do the same.
On the register instead
Go to Catalog and tap Add product. The panel has the same fields with a few different labels:
- Price is My Price.
- Barcode is UPC / Barcode.
- Add photo is the Add image tile.
- Status is the for-sale switch: Listed sells it, Archived saves it without selling it ("Saved hidden — list it later.").
- Save adds it. Discard closes without saving.
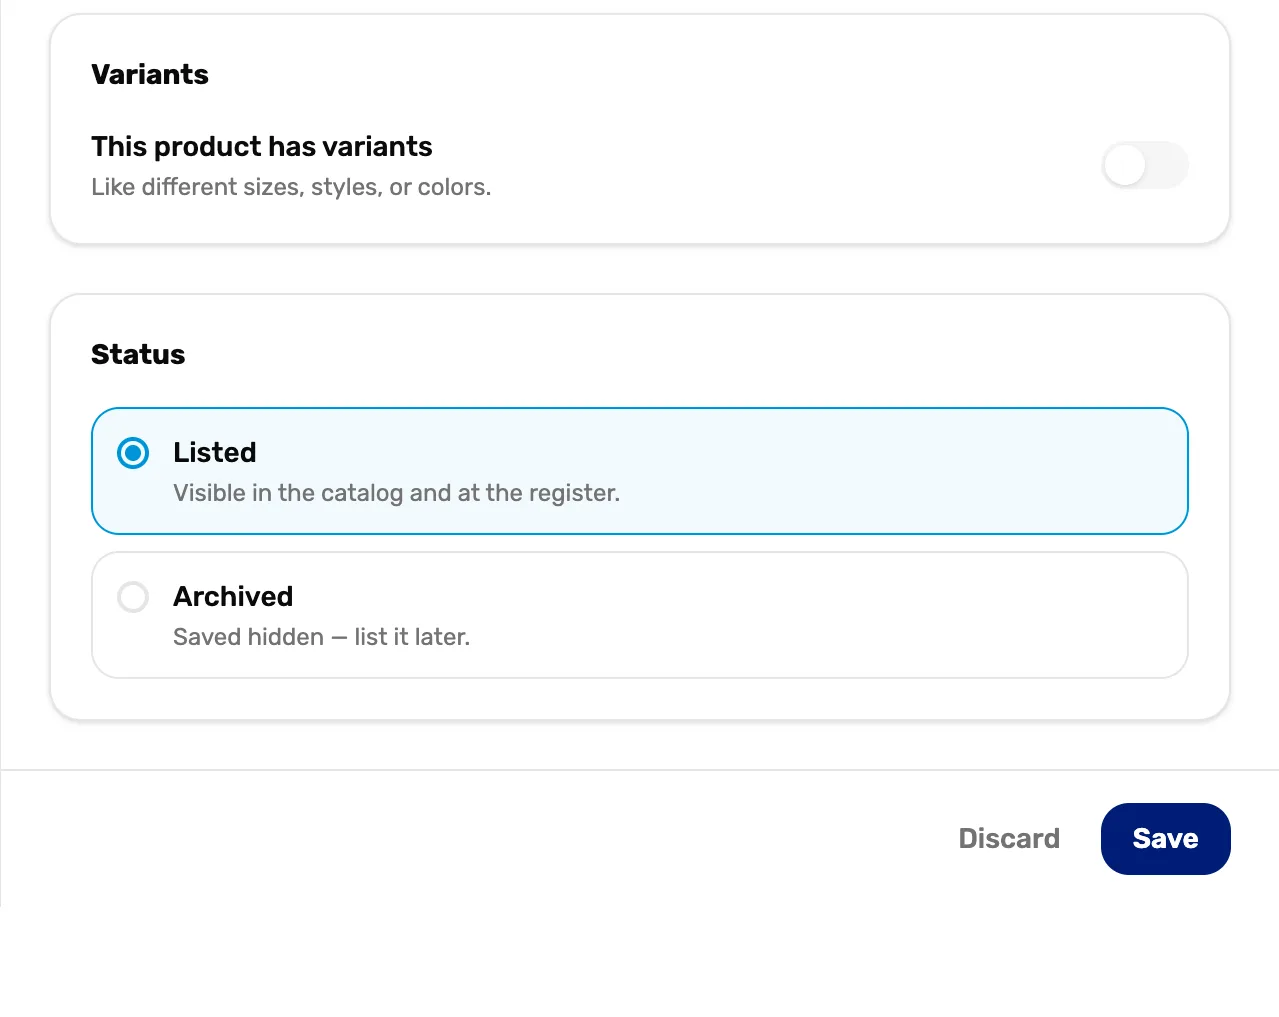
- This product has variants. The register's name for the options switch.
- Status. Listed or Archived.
- Save. Adds the product. It is on the register at once.
To change a product later on the register, tap its row, or use the … menu and Edit. Use as template starts a new product with this one's details filled in.
What happens next
- The product is on the register under Products as soon as it is listed and has a price. Scan its barcode to ring it up.
- Your plan's limit sets how many products the register sells. Past it, the newest products stay in your inventory but don't show on the register. See Free, Plus and Pro.
- To stop selling it without losing its history, switch it off: Listed, hidden and archived.
- Got dozens to add? Import products from a spreadsheet does them in one go.