
What this is for. A location is a place your shop works from or gets deliveries at: your store, a second store, a dock, a warehouse. Each one has a name, a phone number, an address and the people who look after it. Add as many as you like. Only a location where a register runs counts toward your plan.
Two kinds of location
Every location sits in the same list. What you do with it decides which kind it is.
| Kind | What it is | Counts toward your plan? |
|---|---|---|
| Ship-to | An address with no register. Orders from your distributors can ship there, and it can hold stock. | No. Add as many as you like. |
| Register location | A location with at least one active register set to it. | Yes. |
A location becomes a register location when you set a register to it, at the register in Settings › Devices. See Put a register at a location, below.
The first location you add is your main one. It's listed first, and it's picked for you, marked (Default), when you choose where an order ships.
Open Locations
Go to Locations on OneDive B2B. It's also in the menu under your name, at the top right.
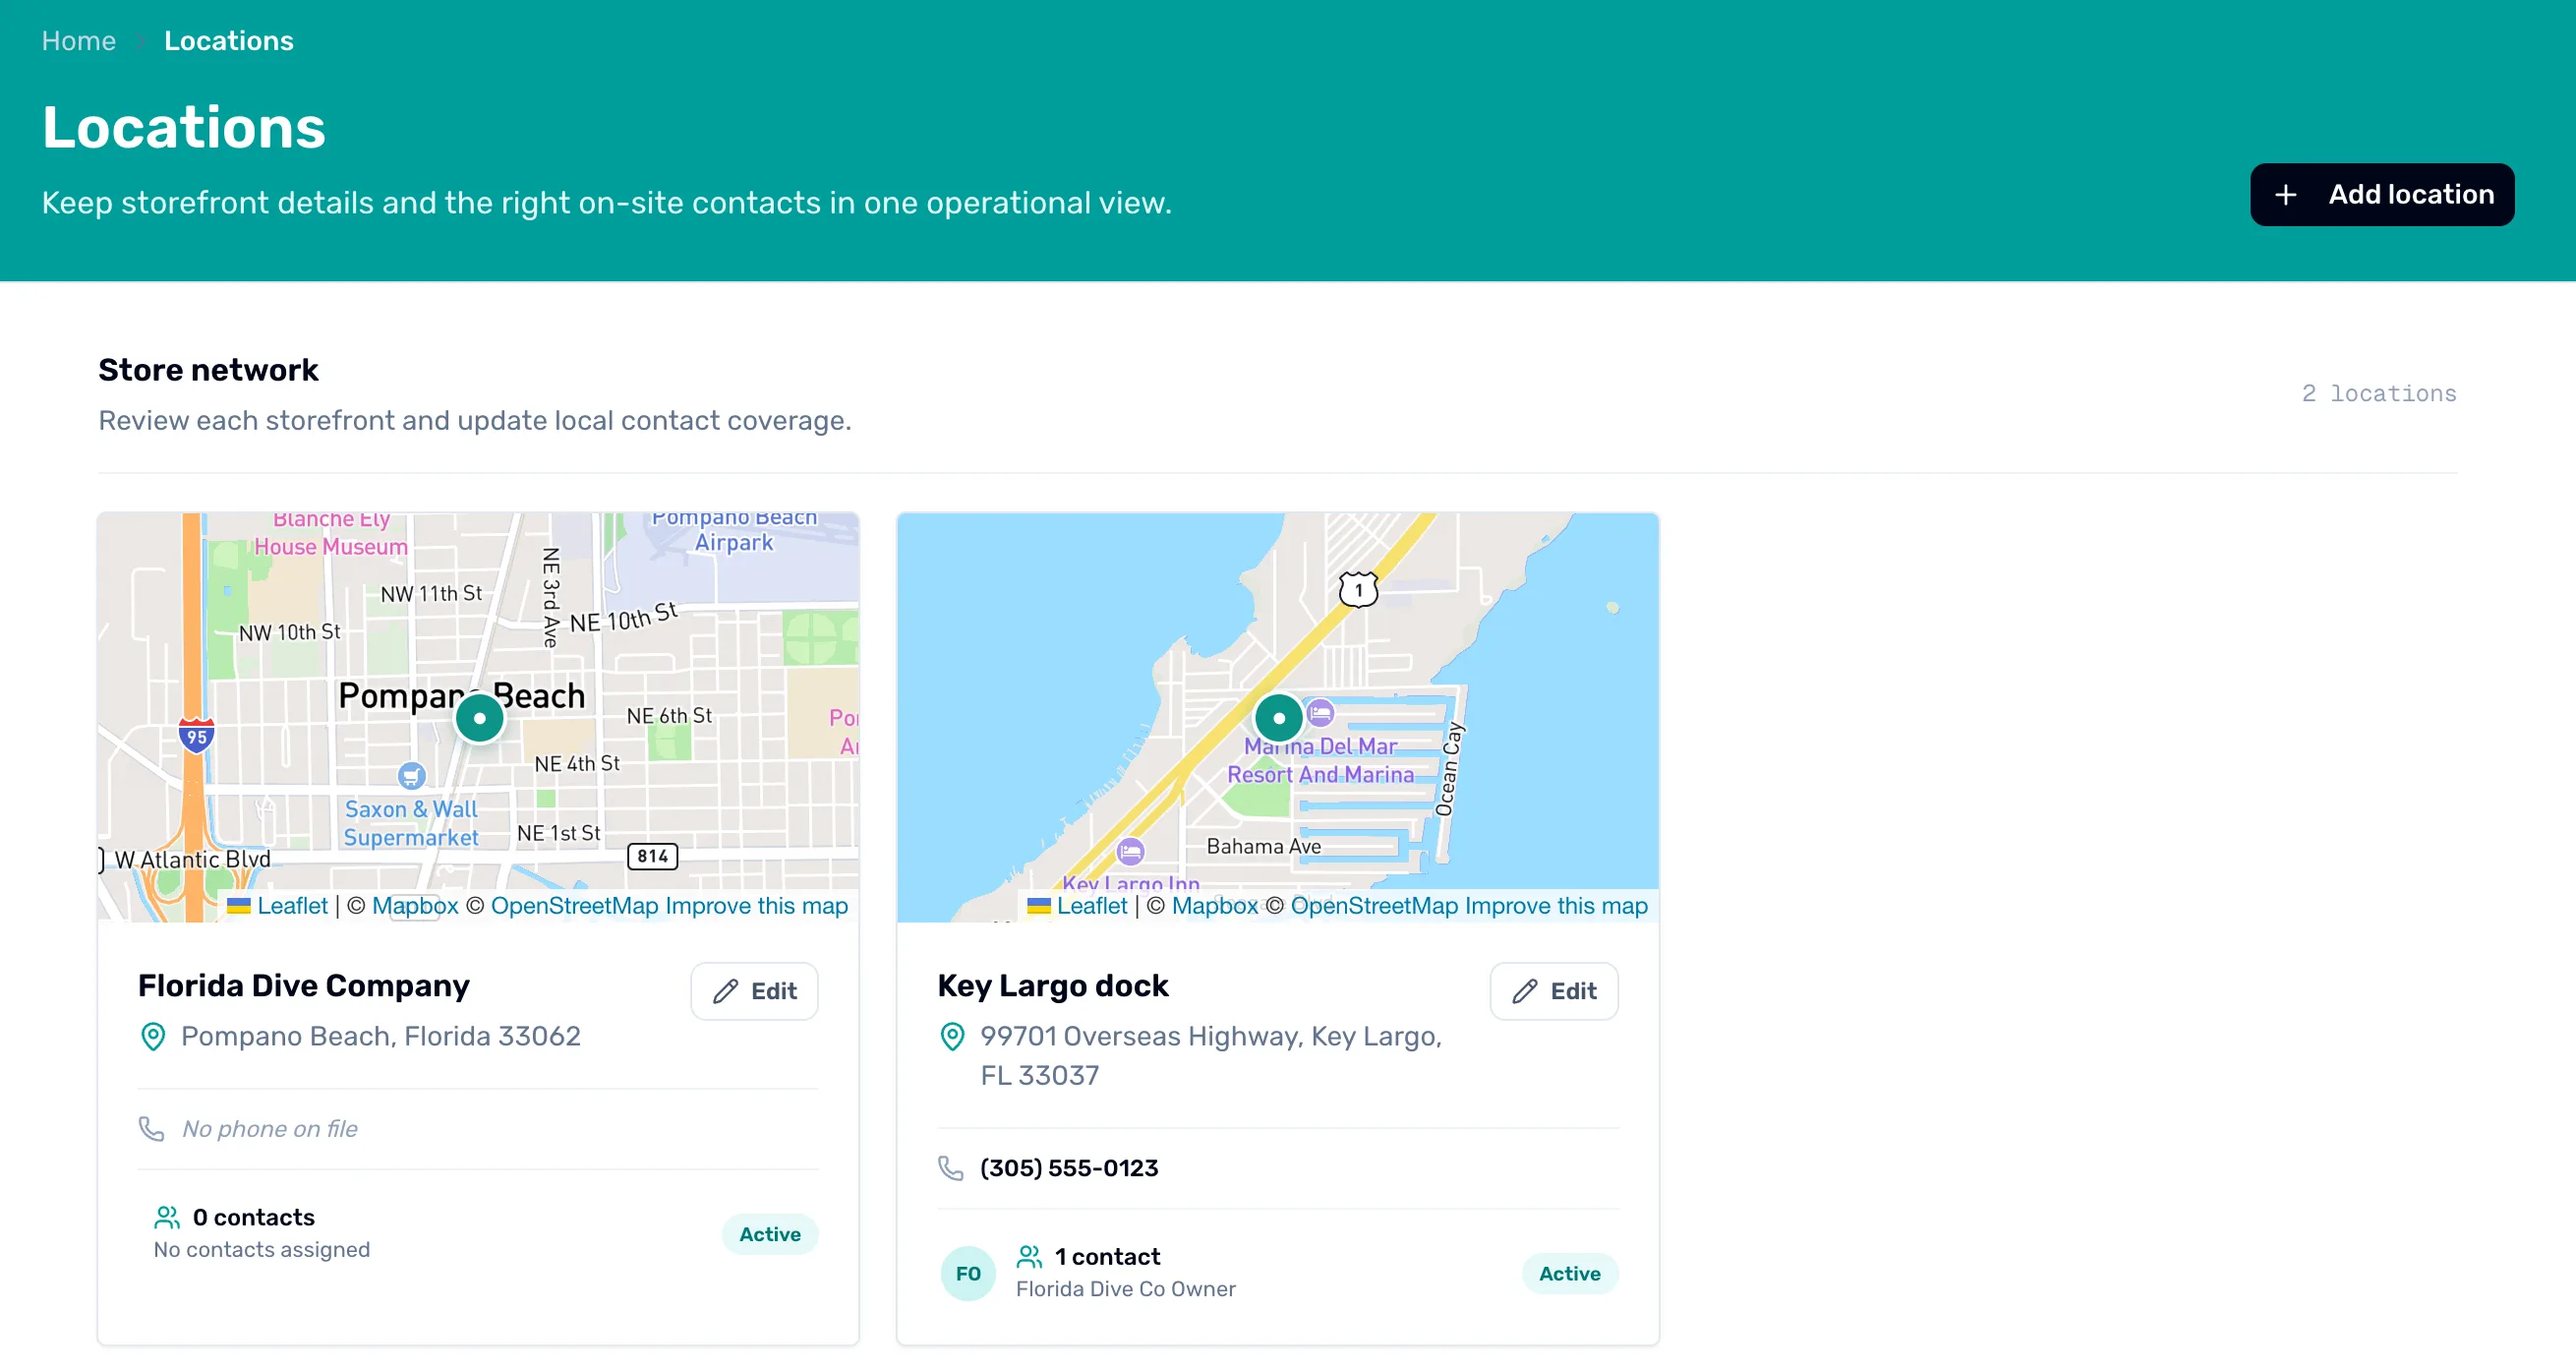
- Add location. Adds a new one. Step 2.
- The map. Where the address is. No location on the map means the address couldn't be found.
- Edit. Changes this location. Step 4.
- Contacts. The people who look after it.
- Active. Every location you add is active.
Add the location's details
Tap Add location. Under Location details, fill in every field. They are all required.
- Location name. What your team calls it, like "Key Largo dock".
- Phone. The number for this location.
- Street address. Start typing and pick the address from the list. It fills in City, State and ZIP code for you. Check them.
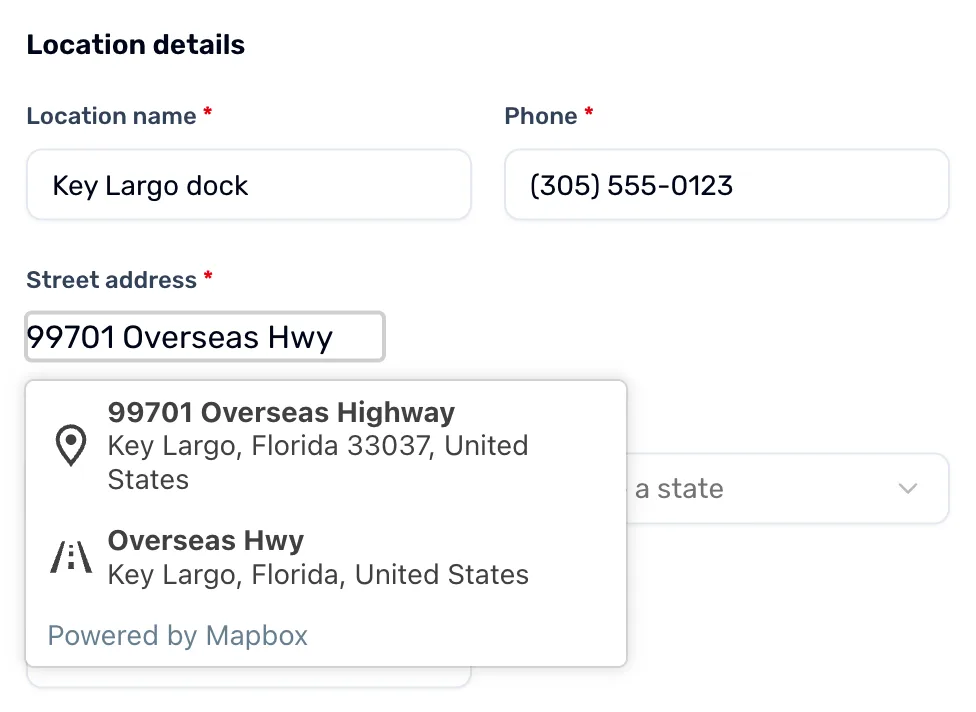
- Location name. Shows on the card, on the register and on orders.
- Phone. Shows on the card.
- Street address. Pick a suggestion so the map can find it.
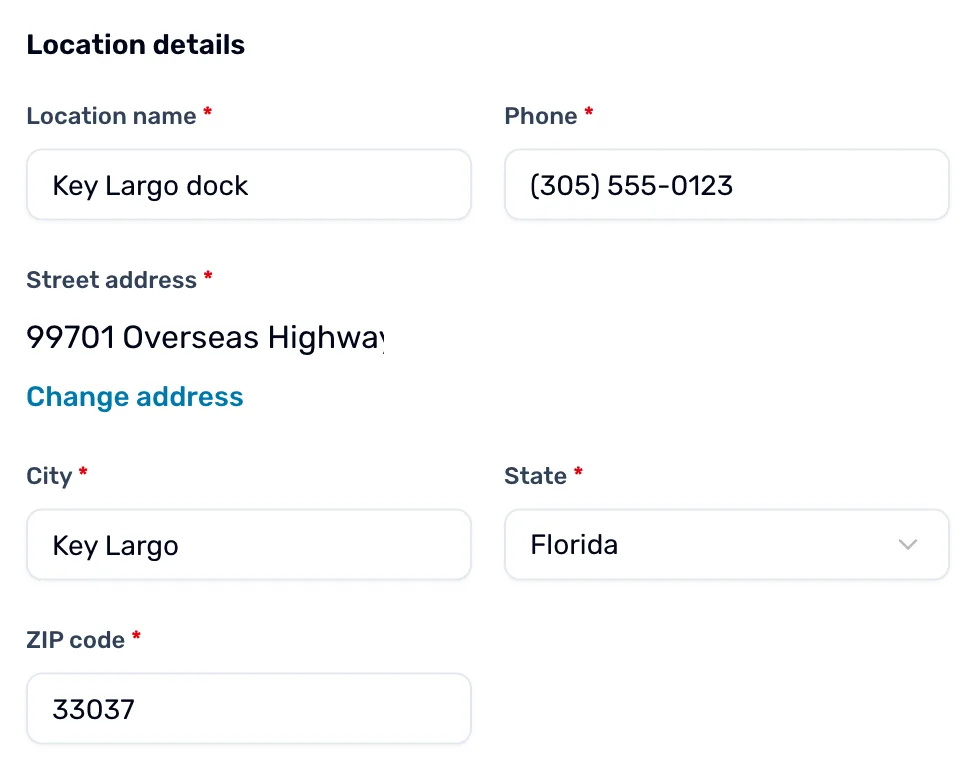
- City. Filled in from the address. You can change it.
- State. A list of US states.
- ZIP code. Filled in from the address.
If a field is empty when you save, the box says All location fields are required.
Choose the contacts
Under Assigned contacts, "Select everyone who supports this location." Tick each person on your team who looks after it. The count beside the heading, like 1 selected, goes up as you tick.
To add someone who isn't on your team yet, tap Add a new contact. Type their name. Email and phone are optional. Tap Add a new contact again for another one, or Remove to drop one.
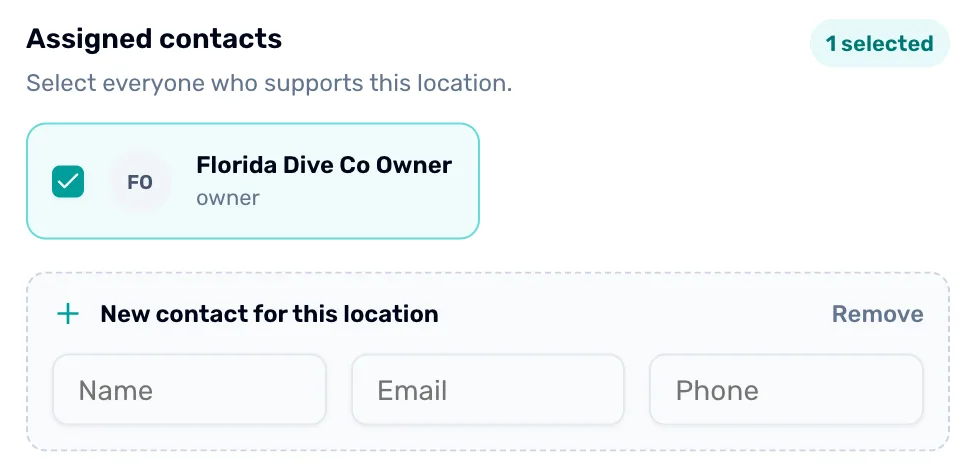
- 1 selected. How many people are ticked.
- A team member. Tick to make them a contact here.
- New contact for this location. Adds a new person to your team. Read the warning below first.
Tap Add location at the bottom to save. The new card shows in the list.
Edit a location
Tap Edit on its card. The box is called Edit location. Change what you need and tap Save changes.
Put a register at a location
This is done at the register, not in OneDive B2B. Go to Settings › Devices. Under Registers, tap Configure on the register, pick its Location, and tap Save changes. Adding a new register asks for its location the same way.
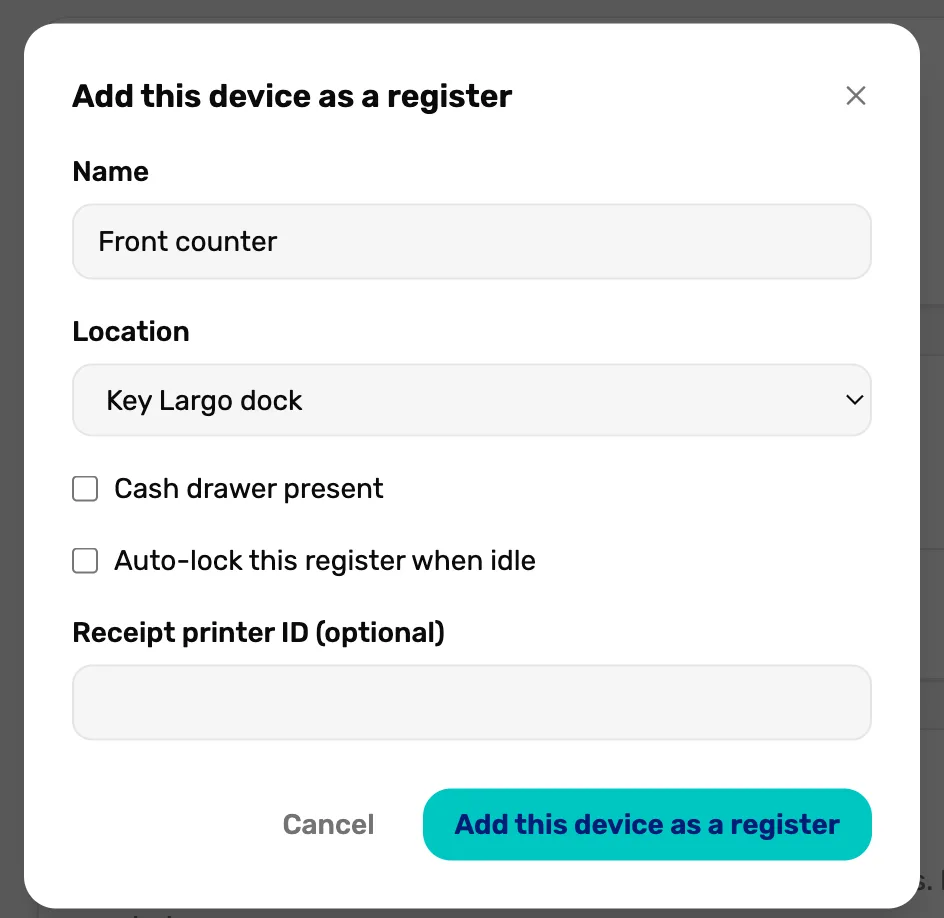
- Location. Where this register is. Its sales and stock count there.
- Add this device as a register. Saves a new register. When you configure one, the button is Save changes.
If your plan's register locations are all in use, the box says Running a register at another location needs a bigger plan, and Contact us to add more. Use Support to ask.
What counts toward your plan
- Counts: a location with at least one active register.
- Doesn't count: a location with no register, or only deactivated ones.
- A second register at the same location doesn't count again.
- Adding a location never runs into a limit. Only putting a register at a new location can.
- Deactivating a location's last register in Settings › Devices takes it off the count.
Your plan's numbers are in Free, Plus and Pro.
Where you see locations at the register
Your location's name is under your name at the top of the register. With more than one location, tap it to switch.
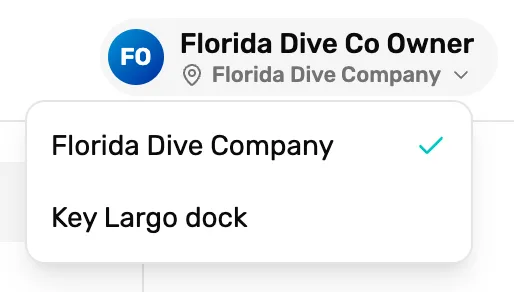
- The location line. Where you're working now.
- The list. Tap another location to work from it.
In a shop with more than one location, a device that isn't a register yet asks Which location are you working from? Pick one and tap Set location. Skip for now closes it, and you work from your main location until you pick.
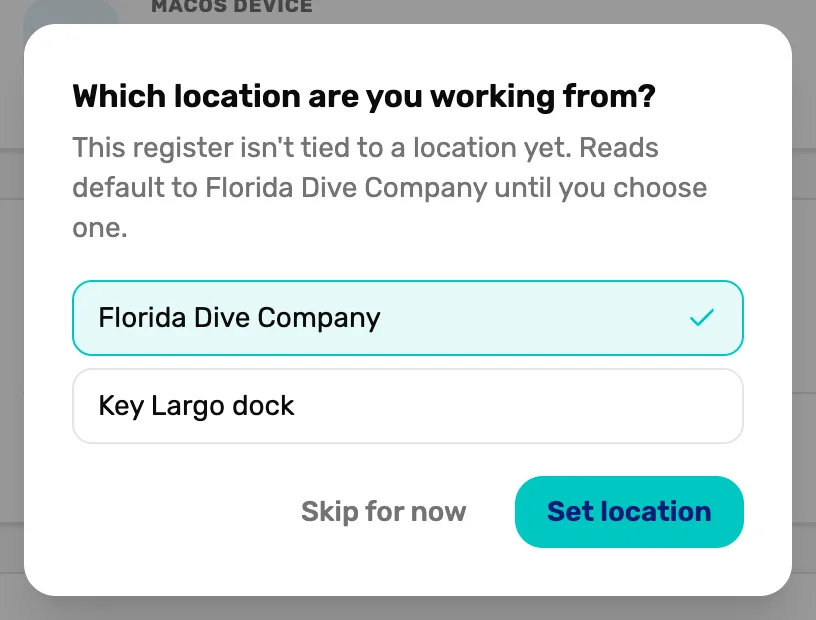
- Which location are you working from? Shows on a device that isn't a register yet, in a shop with more than one location.
- Your locations. Tick the one you're at.
- Skip for now. Closes it. You work from your main location.
- Set location. Works from the one you ticked.
What you can't do here yet
- Remove a location or mark it inactive. There's no button for it. Ask Support.
- Change which location is your main one. It stays the first one you added.
- Add a second address line, like a suite number. Put it in the location name for now.
What happens next
- What each plan includes: Free, Plus and Pro.
- Your shop's own name, address and logo: Shop profile and branding.